If you’re sorting seed packets in January–February, run a quick germination test. It’s the fastest way to check whether older seeds are still worth sowing in the UK. You’ll get a percentage you can act on. That tells you whether to sow normally, sow thicker and thin later, or replace the packet. In cool homes, germination can be slow. Use a warm, steady spot and don’t call it too early.
Start with a quick germination test (10–15 minutes to set up)
A germination test is the most reliable way to see if a seed is worth sowing. It’s a check you can do at home and it beats guessing from appearance or just hoping for the best.
I have a large amount of seeds from packets I opened in previous years. I would prefer to use what I have. This way, I can avoid spending money on new seed packets. Unfortunately, sowing windows for seeds can be fairly short. I don’t want to waste time on seeds that will not germinate. A germination test has been the saviour of many of my growing seasons.
January–February note (UK): germination can be slower in cooler rooms and low light. If your house sits cool, you can accidentally mark seed as “dead” when it’s simply cold and slow. RHS guidance for indoor sowing often assumes a warm spot. Typical germination temperatures are around 18 °C. Always follow the packet if it differs.

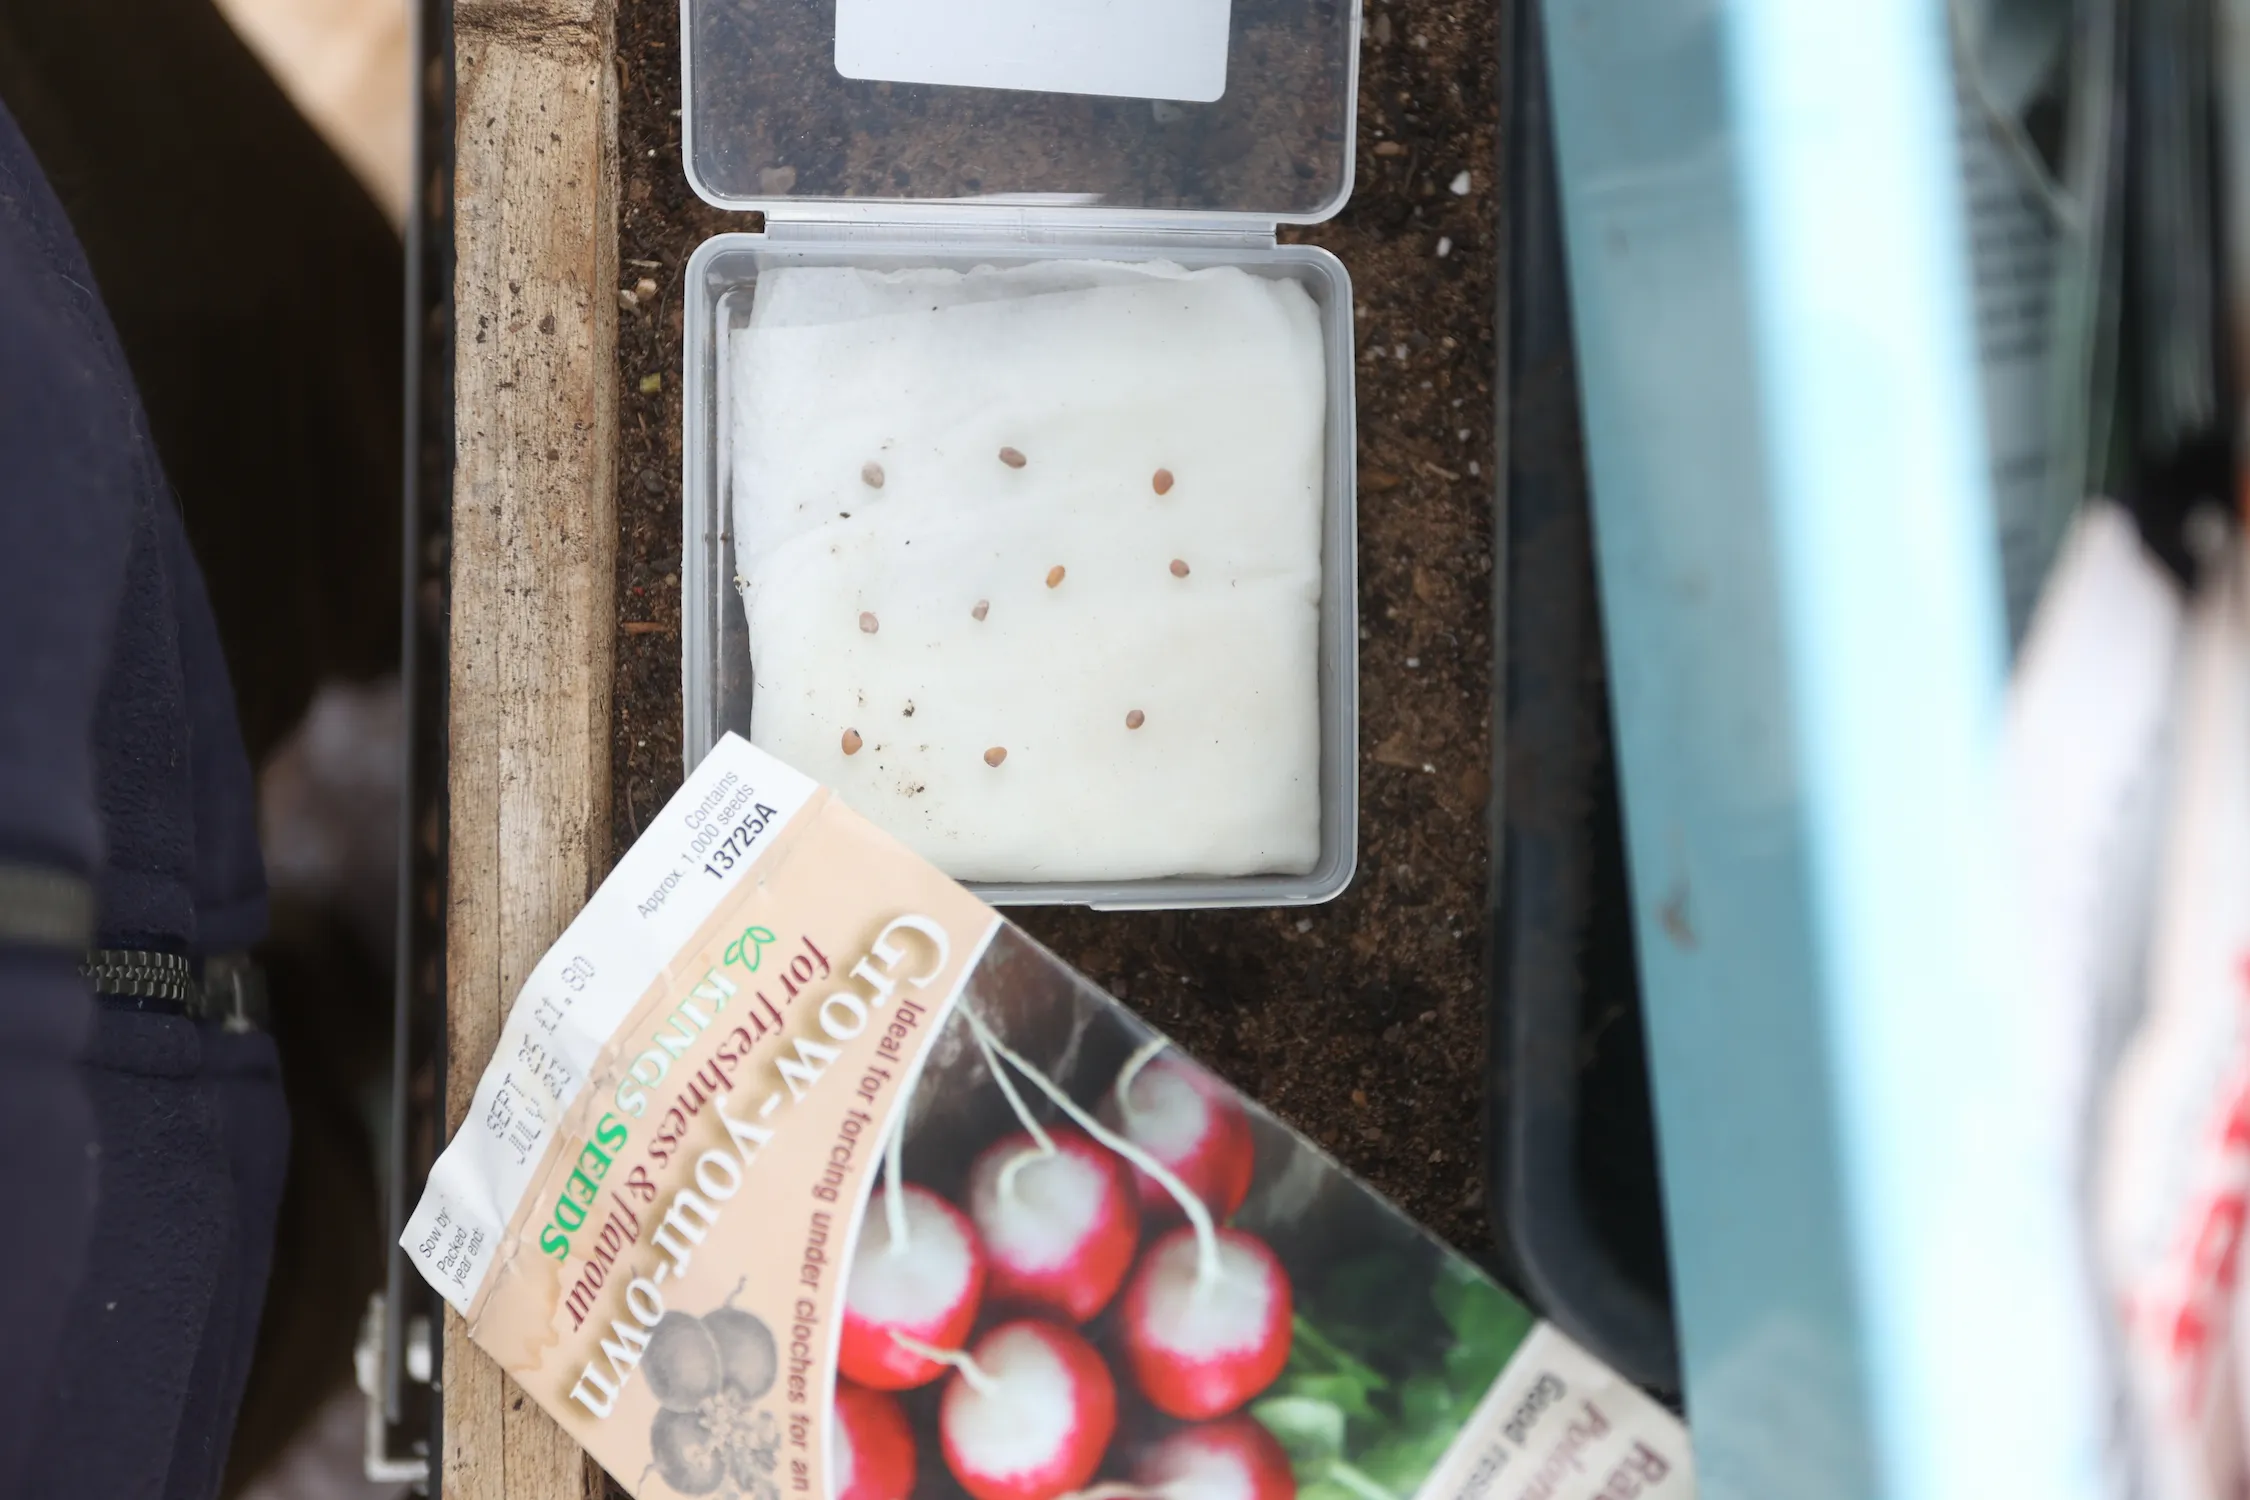
Paper towel (kitchen roll) method
- Count out 10 seeds (or 20 if you have plenty). Using 10 keeps the maths simple.
- Dampen a double layer of kitchen roll so it’s moist but not dripping.
- Spread the seeds so they don’t touch (helps avoid mould and lets you count clearly).
- Seal for humidity: slide the towel into a loosely closed food bag or a lidded tub. Over the years I’ve tried both methods and found a small lidded tub works the best. You want moist air, not standing water.
- Keep warm-ish: a warm room, airing cupboard, or the top of a fridge can work. If you’re using a heated propagator for early sowing anyway, this is a good moment to reuse that warm space. (If you’re new to heated setups, we have a practical UK guide: how to start seeds early with a heated propagator.)
- Check daily for moisture. Re-dampen, but not soak, if it starts to dry out.
- Record the see spouting as soon as you see a clear root tip (the radicle). That counts as “germinated”.
Tip for accuracy: if the seed packet gives a germination time window, respect it. If you can’t find it, give older seed more time than fresh seed. Do this especially in cool indoor conditions before calling it a fail.

Decision marker — avoid a false fail:
If your test is sitting in a cool room, move it somewhere warmer (aiming around typical indoor sowing warmth) and give it longer. Cold slows germination; it doesn’t always kill viability.
Simple kit that makes seed testing (and early sowing) easier
This post may contain affiliate links. If you buy through them, I may earn a small commission at no extra cost to you.
Windowsill trays + lids keep tests and early sowings neat, humid and easy to manage on a UK windowsill.

Use these thresholds to decide what to do next
A germination test is useful only if it changes your decision. It helps you decide whether to sow the seeds or how many to sow. The goal is not perfection. It involves choosing the right approach for the time of year. It also considers how much you need the crop. In many cases when using old seeds, some seeds will germinate while others will not. This difference indicates how many seeds to sow to achieve the desired number of plants.
Use the simple rule-of-thumb bands below to decide whether to sow normally, sow thicker, or replace. In Jan–Feb, it’s often better to be decisive with slow-to-grow crops (like chillies) because lost weeks are hard to recover.
| ~70%+ germination | Sow normally. This seed lot is performing well enough for most home growing. |
| ~40–70% germination | Sow thicker (and expect thinning). Worth using up for many crops if you’re organised. |
| <~40% germination | Replace for anything time-sensitive or where you need a reliable stand. You can still use it for “bonus” sowings if you’re not relying on it. |
How to “sow thicker” without overthinking it
When seed viability drops, you can often compensate by sowing more seeds than usual. This gives you a better chance of getting some seeds to germinate. A simple, practical heuristic is:
Decision marker — when sowing thicker is fine:
If your test germination is G%, sow roughly 100/G times your normal rate. Example: at 50% germination, sow about 2×. Then thin to the strongest seedlings.
For module trays, the decision is straightforward: sow two seeds per cell instead of one; or three instead of two. For direct sowing later, it can mean sowing slightly more thickly, then thinning once you can see what’s come up. (If you want a refresher on thinning and avoiding weak, stretched seedlings, we have a dedicated guide: how to prevent leggy seedlings.)
Know which seeds go off fast (and which last for years)
Seed “age” isn’t consistent across all varieties. Some types decline quickly, while others can remain usable for years if stored well. That’s why a germination test is so powerful: it replaces guesswork with a quick reality check.
Most of my seeds are kept in a plastic box in my greenhouse’s not the most ideal location. The heat and cold throughout the year create a poor environment to store seeds. That is why I rely on germination tests.
The Real Seed Catalogue publishes an estimated lifespan table for properly dried seed. This list is ideal if you want a UK-friendly version. The table represents years from harvest. Treat it as guidance rather than a promise. Storage conditions are important. Shop-bought seed is often already part-way into its first year.
| Onions / leeks / spring onions | Usually ~1 year (up to ~3 max with good storage) |
| Parsnips | Up to ~2 years max |
| Beans / peas | ~3–4+ years |
| Brassicas (cabbage, kale, etc.) | ~3–6 years |
| Tomatoes | Up to ~6 years (often ~3) |
| Cucumbers / melons | Up to ~10 years |
How to use that table in January–February planning: prioritise testing (and replacing) short-lived seed first (alliums, parsnips). For longer-lived seed (tomatoes, brassicas), a borderline test result may still be worth using if you sow a bit thicker.
For seasonal planning inspiration, consider these two helpful posts. They can guide you on what’s worth starting soon. Check what seeds to sow in February (UK) and what to sow in March.
Store and label seeds so they last longer
If you only change one thing this winter, improve your storage. Viability is most often lost through damp and warmth over time, not because a packet hits an “expiry date”. Better storage turns “old seeds” into “still usable seeds”.
As a baseline: keep seed cool, dry and dark in an airtight container. RHS advice for storing collected seed includes drying it first. Next, place the seed in labelled packets or envelopes. Then, keep it airtight with a desiccant to reduce excess moisture. Garden Organic similarly emphasises cool/dry storage and notes that moisture and warmth reduce seed life.
- Container: a clip-top box, jar, or airtight food container.
- Inside the container: keep seed in labelled envelopes or packets (variety + year).
- Location: cool cupboard, or fridge if you can keep it dry and stable.
- Avoid: damp sheds, warm kitchens, and anywhere that swings between warm/cold and humid/dry.
Peat-free compost note (UK): When transitioning from testing to sowing, use a seed compost appropriate for seedlings. Handle watering with care to keep it evenly moist, not waterlogged. If you’re deciding what to buy, we have background reading available on peat-free choices here: peat-free compost.
Peat-free compost for seed sowing
Peat-free compost helps you get consistent moisture without the “either dust or swamp” problem that can happen with tired mixes.
What to do with failed (or borderline) seeds
In January and February, the cost of delay is often higher than the cost of seed. If the test result is weak, and you need the crop to work, replacing seed is usually the calmest decision. This is particularly true for early starts where weeks matter.
If the result is borderline (40–70%)
- Use modules, not open trays: you can keep track, thin easily, and transplant the strongest.
- Sow thicker on purpose (e.g., 2–3 seeds per cell), then thin decisively.
- Label clearly so you don’t mistake “slow because it’s cold” for “dead because it’s old”.
If it fails (<40% or nothing happens)
For anything you’re relying on, replace it if less than 40% of seeds germinate, or none at all. If you still want to experiment, you can sow the remainder as a “bonus” batch. However, don’t let it steal prime windowsill space from seed that’s ready to perform.
If you’re already setting up warm sowing areas, it may be worth reviewing how you’re using heat and light. This review ensures you don’t trade “better germination” for “leggy seedlings”. Our guide covers that balance: heated propagator setup (UK).
Replace low-viability seed quickly
Fresh seed is often the fastest fix when germination drops below your comfort zone — especially early in the season.
Common mistakes to avoid
- Calling it too early: older seed in a cool room can be slow. Move the test warmer and extend the wait before you bin it.
- Letting the towel dry out: even brief drying can stop germination mid-process.
- Soaking the seeds: you want moist air + moist towel, not seeds sitting in water (mould risk rises fast).
- Testing too few seeds: 10 is a good minimum; fewer makes the result jumpy and misleading.
- Not labelling the test: it’s easy to forget what’s what after a couple of days.
- Using the “float test” as your decision: it can mislead; germination testing tells you what matters — what actually sprouts.
FAQ
FAQs
How many seeds should I test?
Ten seeds is the simplest minimum because the percentage is obvious (7/10 = 70%). If you have plenty of seed, testing 20 makes the result more stable.
What counts as “germinated” in the paper towel test?
Count a seed once you see a clear root tip (the radicle). You don’t need leaves; you’re measuring viability, not growing it on in the towel.
My test went mouldy — does that mean the seed is bad?
Not automatically. Mould usually means the setup was too wet or too airless. Retry with a damp (not soaked) towel, better spacing, and a loosely closed bag/tub.
Should I put the test in a sunny window?
Warmth matters more than sun for the test itself. A stable warm spot works well; strong sun behind glass can also overheat a sealed bag. If you’re sowing in compost, RHS notes many seeds prefer around typical indoor germination warmth and a bright position for growing on.
Can I store seeds in the fridge or freezer?
Yes, if you keep them dry and airtight. Garden Organic notes cool and dry storage helps preserve seed, and discusses fridge/freezer storage as an option when moisture is controlled.
Is it worth sowing borderline seed in January–February?
Often yes — if you sow thicker and you’re not depending on a perfect stand. For time-sensitive crops where lost weeks hurt, replacing low-viability seed is usually the calmer option.
Worried you are getting behind and it’s too late to sow? Check you our guide on how to catch up.
You must be logged in to post a comment.