Take seedlings off a heated propagator or heat mat as soon as they emerge, because bottom heat helps most with germination and can start causing new problems once growth is above the compost.
At a glance
- Best rule: Use bottom heat for germination first, then switch the job to light, airflow and steadier moisture.
- Do not wait for perfection: If the first seedlings are up, act for those seedlings rather than waiting for every cell to catch up.
- Uneven trays: Move the emerged modules or pots off heat if you can, and leave the slower ones warm a little longer.
- Main warning signs: Leggy growth, heavy condensation and compost drying faster than you expect.
- What to do next: Give seedlings brighter light, more ventilation and closer moisture checks straight away.
I have left seedlings on bottom heat too long before, and the result was not better growth. It gave me leggier plants and trays that dried out faster than I wanted. That is why I now treat heat as a germination tool, not something seedlings need indefinitely.
UK timing note
Last checked: April 2026
Use this as a guide, not a fixed rule: In a cold UK home or unheated greenhouse, the change after germination may need to be gentler. Seedlings still want brighter, slightly cooler conditions, but not an abrupt move into a cold draught or sharp night chill.
Take them off heat when they emerge, not when the tray looks perfect
For most seedlings, bottom heat has done its main job once germination starts. At that point the priority changes. Seedlings need brighter light, fresher air and steadier moisture control more than they need a warm, enclosed lid.
The simplest rule is this: once seedlings appear, remove the cover and start moving those seedlings out of constant bottom heat. The RHS advises removing the glass or plastic covering as soon as seedlings appear, and Thompson & Morgan says fast-growing seedlings often need weaning off a propagator within the first few days after germination.
That does not mean seedlings suddenly want cold conditions. It means they usually want less artificial warmth and less trapped humidity than they needed for germination. If you keep giving them strong bottom heat and a closed lid after emergence, you often get softer growth, more stretch and faster drying at compost level.

Move them off heat now
- The first seedlings are up and starting to straighten.
- Condensation is building heavily under the lid.
- The compost is drying quicker than expected.
- The room is bright enough to grow seedlings on.
Leave some warmth a little longer
- Only part of a module tray has emerged and you can separate the emerged section.
- The room is very cold and you need a gentler step down rather than a sudden change.
- You are growing slower, uneven germinators and the emerged seedlings can be moved separately.
- You can increase ventilation first, then reduce heat over the next day or two.
Do not wait for the whole tray if the first seedlings are already up
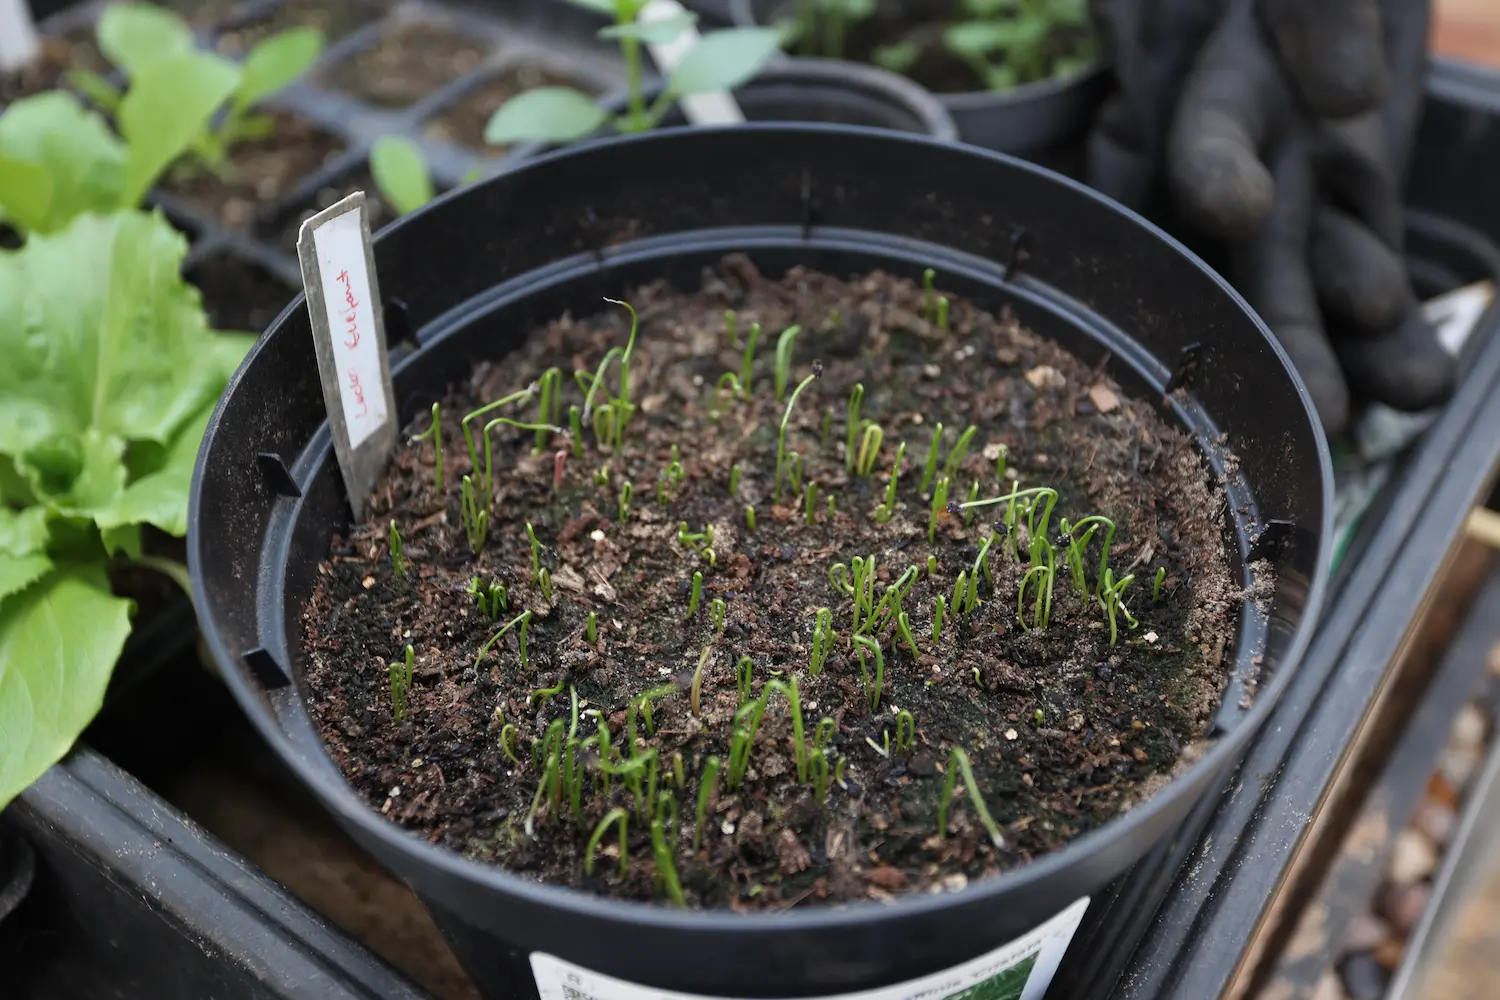
This is the point that catches a lot of people out. A tray rarely germinates in perfect unison, especially in a normal home, greenhouse or bench setup. If you wait for every cell to emerge before you remove the cover or reduce heat, the first seedlings can start paying the price for the slowest ones.
If the whole tray comes up together, the decision is easy. Remove the lid and move the tray into brighter conditions straight away. If germination is uneven, the best answer is to split the difference if your setup allows it. Move the emerged pots or modules off heat and leave the laggards warm a little longer rather than keeping everything hot and closed.
This is one reason modular trays are easier to manage than open seed trays. They let you respond to what the seedlings are doing instead of forcing the whole batch to stay in the same conditions.
If you are still working out how much bottom heat you need in the first place, my guide to starting seeds early in the UK with a heated propagator covers the setup side. This page is the next step once germination has happened and the handoff becomes the real job.
Some crops want a faster handoff than others
Fast-growing seedlings usually need to come off heat sooner. The RHS advice for courgettes, for example, is to take seedlings out of the propagator or remove the bag once seedlings appear. Thompson & Morgan also says fast growers often need weaning off within the first few days after germination, while slower-growing subjects can stay a little longer if they still need a gentler transition.
In practical terms, courgettes, cucumbers and other quick growers are poor candidates for lingering in a hot, humid setup once they are up. Tomatoes and basil also benefit from a prompt move into bright conditions. Chillies and aubergines can be more uneven, especially early in the year, so the better answer is often to move the emerged seedlings first rather than keeping the whole batch on heat for convenience.
The safer rule is to watch the tray, not chase a generic number of days. Once seedlings are up, upright and asking for light, the heat is usually no longer the main job.
Watch for the signs that heat is now part of the problem
Signs the handoff is going well
- Seedlings stay upright and compact rather than racing upwards.
- The lid is off or vented and the leaves still look turgid and healthy.
- The compost stays evenly moist without needing constant rescue watering.
- New growth looks greener and steadier once the seedlings are in brighter light.
Signs they have stayed on heat too long
- Stems start stretching quickly and leaning towards the light.
- The compost surface dries very fast, especially near the edge of the tray.
- Heavy condensation sits under the lid long after seedlings have emerged.
- Growth looks soft and pale rather than sturdy.
If the main issue now is stretch rather than slow germination, more heat is not the fix. My guide on how to prevent leggy seedlings is the next step from here.
What to do immediately after removing heat
The first move is not to pot them on or harden them off. It is to give them a better growing-on environment. That means brighter light, more ventilation and closer moisture checks.
Remove the lid or open the vents wider straight away. Move seedlings into the brightest suitable place you have, but avoid putting them straight into a cold draught or harsh temperature swing. Water lightly and watch the compost more often than you did before, because trays can dry differently once the lid is gone and the heat is reduced.
In a very cold room, the aim is not to move seedlings into chill, but to step them down from germination conditions into brighter, airier growing conditions.
If your room is cold, a gentler weaning process can help. Thompson & Morgan advises increasing ventilation and reducing heat gradually for heated propagators rather than making every change at once. That is especially useful in early spring, in unheated greenhouses or where nights still turn sharply cold.
After that, the next jobs are simple: keep them bright, avoid waterlogging, prick out or pot on when they are large enough to handle, and only think about hardening off later when they are ready for outdoor conditions. If you are heading for that stage next, my guide on how to harden off seedlings in the UK picks up from there.
After germination checklist
- Remove or vent the lid as soon as seedlings appear.
- Move emerged seedlings into brighter conditions.
- Reduce or remove constant bottom heat for those seedlings.
- Check moisture more often once the cover is off.
- Prick out or pot on once seedlings are large enough to handle.
Common mistakes
Common mistakes
- Waiting for the whole tray: The first seedlings can become leggy or soft while you wait for the slowest cells to catch up.
- Removing heat but forgetting light: Seedlings taken off heat still need strong light, or they will stretch anyway.
- Keeping the lid shut too long: Trapped humidity can become more of a problem once seedlings have emerged.
- Making the change too harsh in a cold space: Seedlings want a step down, not a shock.
- Using heat to fix every problem: Once germination has happened, the next bottleneck is often light, airflow or moisture handling.

If you are seeing grey mould, collapsing stems or constant damp around the compost surface, the next problem may be disease pressure rather than temperature. My guide on preventing damping off in seedlings covers that stage in more detail.
If you want a non-commercial reference point for this stage, the RHS guide to sowing seeds indoors is useful because it is very clear on removing covers once seedlings appear.
You must be logged in to post a comment.